Fibaro is a home automation system that allows you to automate and facilitate various processes in your home. There are several modules that work with the system, but you can also connect products that you may already have in your house, such as Philips Hue.
The Fibaro system
The Fibaro system forms an integrated network of various devices in the home, each of which has a specific function. The devices can also work together in a group for specific tasks. The system consists of three groups: the group that observes aspects, the group that processes those observations and the group that carries out the assignment, after the observed aspects lead to a particular conclusion. An example: the motion sensor sees movement, the hub processes this and the lamp switches on automatically.
The first group consists of sensors and remote controls. Think of the aforementioned motion sensor, but also the smoke detector, the water sensor, a keyfob, a smart button or the sensors for doors and windows. The group that receives and processes the information consists of, for example, the Home Center 2 (the smart home hub ) and the applications for mobile devices and your computer. This executive group consists of products such as the smart plug, a dimmer for the lamps and, for example, the smart thermostat button.
To use Fibaro products, you need a Home Center. The company recently announced the Home Center 3 , but the Home Center 2 and Home Center Lite are also still in use. The smart home hubs communicate via the Z-Wave protocol , allowing them to receive and process data and send commands to other devices in the network. The Lite version is less extensive than the Home Center 2, but that has also made it a bit more accessible.
In this review …
Fibaro is an immensely extensive system of which we cannot literally cover all elements in this review. We want to give a general picture of the possibilities and the products that work with it. In this review we will take a closer look at a number of products, such as the Home Center 2, the motion sensor, the smart plugs, the sensors for windows and doors, the dimmer and the water sensor. We also look at the web environment and the application that is available for both Android and iOS.
Fibaro Home Center 2
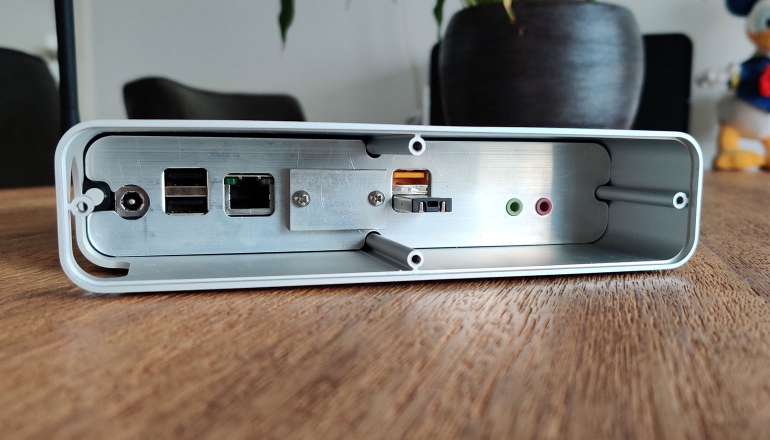
The Fibaro Home Center 2 is the heart of the system. This is the place where all information comes in and is sent, so that the network of devices knows what to do at different times. The actions are all processed locally, so that relatively good hardware is required. It may not seem like much on paper, but the specs are quite powerful for a hub: an Intel Atom processor, clocked at 1.6 GHz, 1 GB of RAM and 2 GB disk space. There is also a USB port.
We often come across such specs in cheaper smartphones and tablets, but the devices cannot be compared with each other. The Fibaro system controller does not have to take into account the playing of multimedia or the holding of a mobile connection, so that all computing power is available for the smart network. You can connect up to 232 Z-Wave devices and make backups in the cloud or on an external hard drive. You can also download and install unlimited plug-ins.
The physical installation of the device is a breeze. You use the included Ethernet cable to connect the controller to your router or mesh system . Then you put the plug in the socket and you can switch on the device. Then you download a program on your computer (Fibaro Finder, the manual explains where and how) so that you can find the system. Not long afterwards you create a Fibaro ID (necessary for the cloud functions, for example) and you are in the web environment of the device.
Add devices
Once the system is up and running we can start adding other devices. You do this via the web interface of the Fibaro Home Center 2. We have installed and tested a number of products and one of the products is the Wall Plug. This is a smart plug as you may have seen it before. Such products exist fine on their own , but are also sometimes included in smart home systems. Such as Fibaro, but also KlikAanKlikUit or the cheaper LSC Smart Connect .
Before you can add a device, however, you must first divide your house into segments (for example, upper floor) and rooms (such as bedroom, bathroom, etc.). Make it as clear as possible for yourself, so that you can quickly find the intended room. You can then add a device by following the steps on the screen. Often you also have to press one button or two buttons on the device for pairing. This is not described in the manual supplied and you have to look it up yourself.
Fortunately, those manuals are all on the Fibaro website. But it does require an extra step from the user. But if all goes well, you are already behind your PC or laptop – which has lowered the threshold again. However, it doesn’t speak for the accessibility of the system. Although performing the connection and installing the products is ultimately quite simple, it is not as simple as with the two systems mentioned above. However, we do not find those extra actions that you have to perform at all annoying.
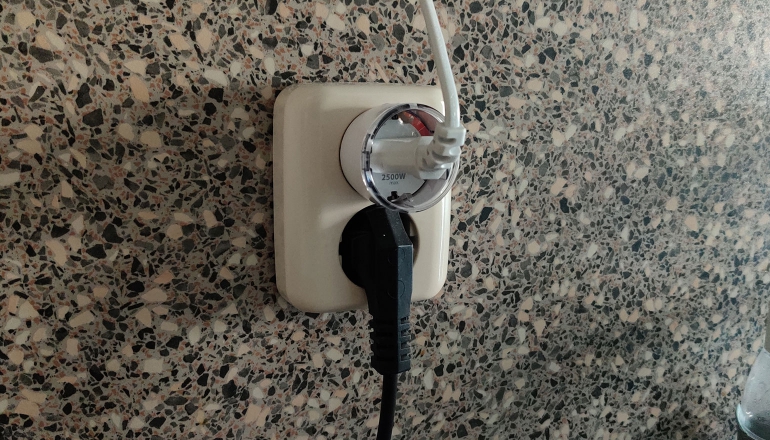
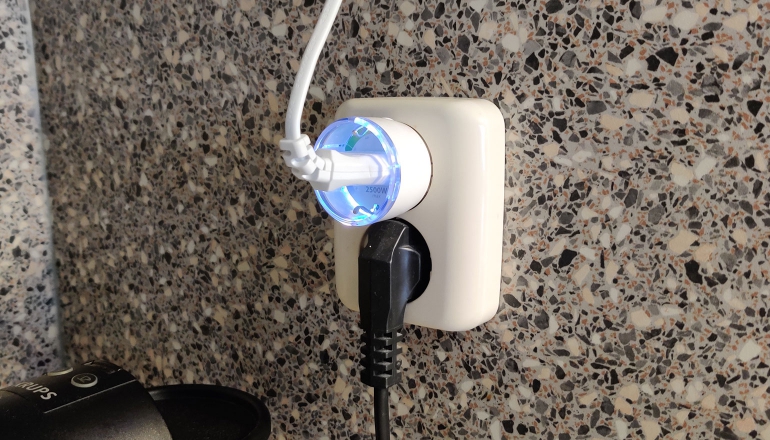
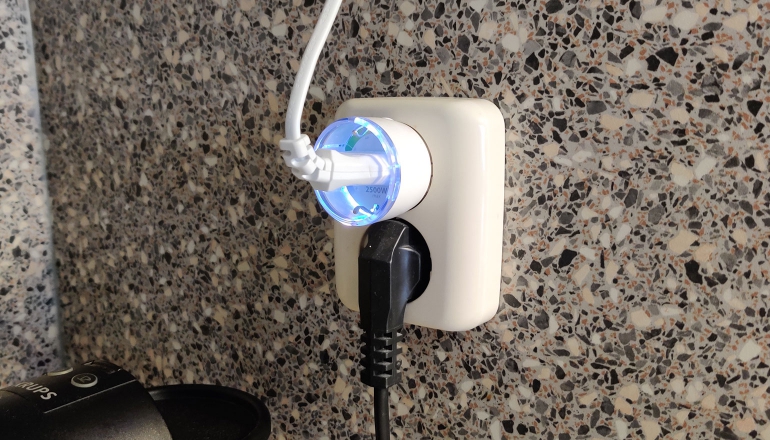
Such a smart plug works immediately after adding it. Via the interface, whether you are using the web environment or the application, you can view the status and switch the product on and off. You can also see how much energy is being used in this case. You can also check this on the Wall Plug, by paying attention to the color. The plug has a ring that changes color based on the amount of energy consumed. The plug contains the colors and the corresponding wattage. A simple and elegant system.
Making devices work together
The best thing is of course to make the system a bit smarter. This can be done, for example, by connecting another Fibaro product to the Wall Plug. Suppose you put the cuttings of a ‘dumb’ kitchen lamp in it, you can activate it in different ways. For example, you can simply set a time that the device switches on and off via the web environment. Or you can link The Button (a smart button) to the lamp, for example, which can function as a simple wall switch. And that’s not all.
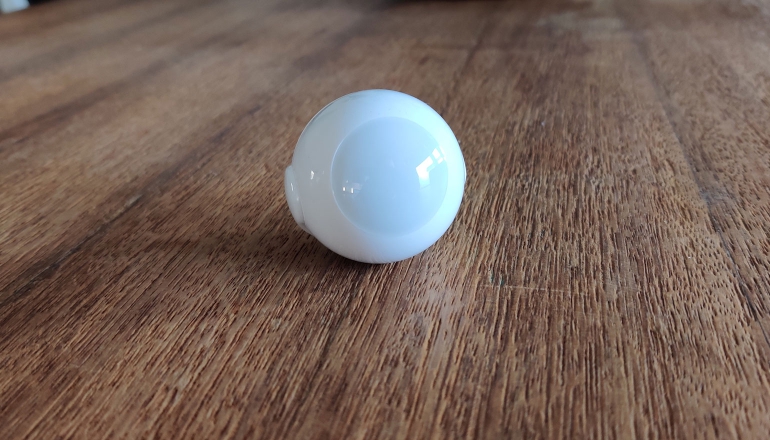
This way you can also use the Motion Sensor as a means with which you determine whether the kitchen lamp should switch on or not. When the ball registers movement, the lamp switches on. If there has been no movement for a while or the timer expires (you can set this yourself, more about that later), the lamp will also go out. You could even combine the motion sensor with the smart button for ultimate control, or you could keep it on the sensor and relinquish part of that control to the smart Fibaro system.
And you can take a few more steps. For example, we have set the motion sensor to only actively activate the kitchen lamp in the smart socket between certain hours of the day. This prevents it from suddenly turning on in the night, while you drink a sip of water with your eyes half closed and do not wake up. We have set the Motion Sensor to activate the lamp every day, half an hour before the sun sets until half past eleven in the evening, when measuring movement. Before and after that nothing happens.
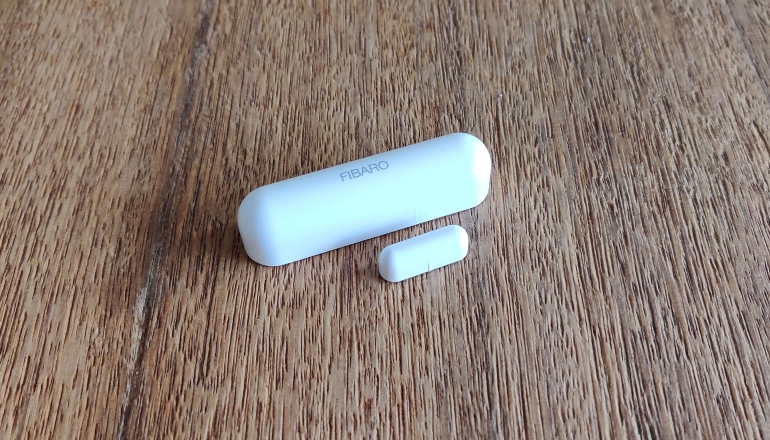
We have also set the water sensor in such a way that it gives a notification on the smartphone where the Fibaro Home Center app is installed. It’s behind the washing machine, just in case. We tested it by pushing it into a layer of water. Within seconds the notification arrived on the phone. The door and window sensor can be used, for example, to switch on lamps or other devices or to switch off the smart heating system in the house.
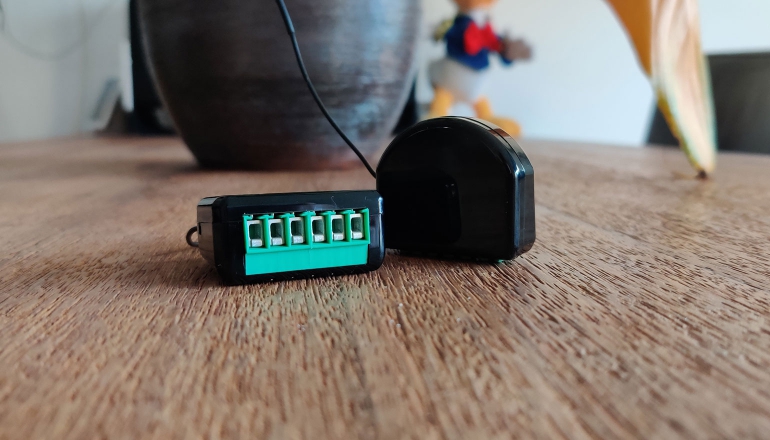
We also installed the Dimmer 2. This is a part that requires some extra knowledge from the user, because you build it in the wall switch. With the module you can operate different light sources. You can dim lights automatically and adjust the light to a certain atmosphere. The module also measures energy consumption and prevents overheating and overload. The great thing about this part is that you can use it with and without a controller. So it is also a stand-alone product.
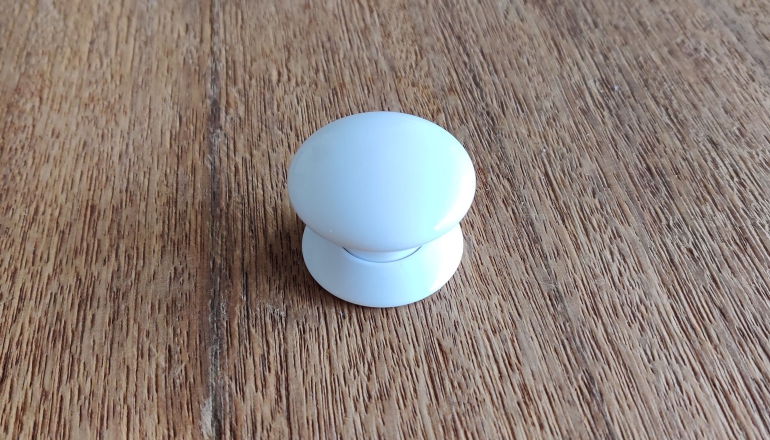
Going into depth with the Fibaro system
Above we have given examples of the possibilities of the system. You can capture those possibilities in three ways; Magic, graphic blocks and LUA. The Magic scene is the easiest way to automate processes. You may know the working method from other smart home systems. You select a device, certain sensor information (such as light or temperature) or, for example, a certain time, specify the trigger, the target device and then what that other device should do.
The Magic method most closely resembles IFTTT and is the most accessible way, because it shows all options immediately and clearly per product. With this you can already practice for yourself and build useful bridges between different sensors and products in the house. You also learn to think in the way the system requires you to. Some actions you have to do with a detour for your feeling. But as soon as you work within the (broad) frameworks of the system, it takes little effort to set up something.
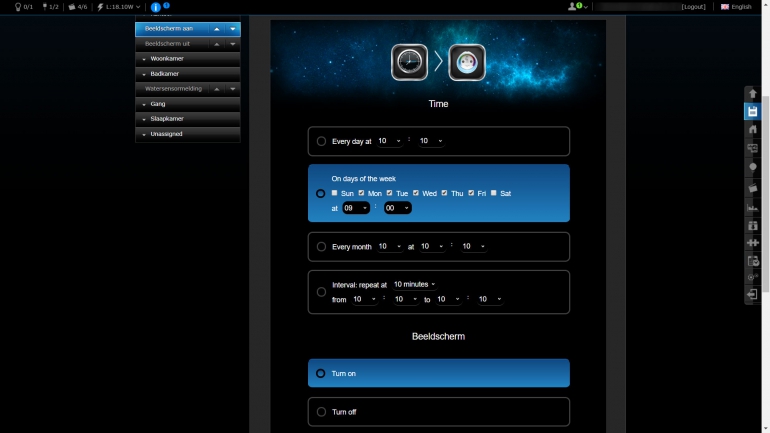
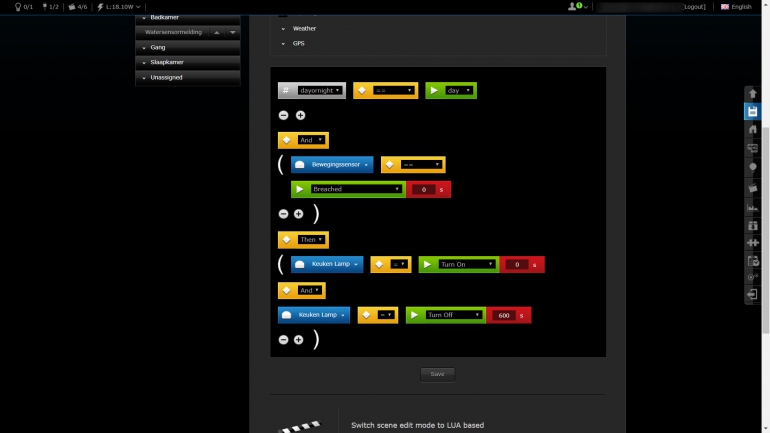
The accessibility of Magic scenes does limit your options. If you want to go a step further, you can opt for the graphic blocks. When you first get started with that, it can be overwhelmed. Because a lot of things are possible due to the number of variables to be set. Fortunately, Fibaro also has some manuals online for this. There are also examples for a number of situations, but some things you will have to figure out yourself – but that’s the nice thing about this system.
Take, for example, the aforementioned kitchen lamp that is linked to the Fibaro Wall Plug. The motion sensor sees when someone passes by and then switches on the dumb lamp. Since we want to prevent the lamp from turning on during the day or in the middle of the night, we need to make sure the system knows when it is daytime and when it is evening. The lamp does not switch on during the day, but it does in the evening. In order to achieve that, you have to take several steps, even before you start the scene in itself.
Fibaro: Scenes and Panels
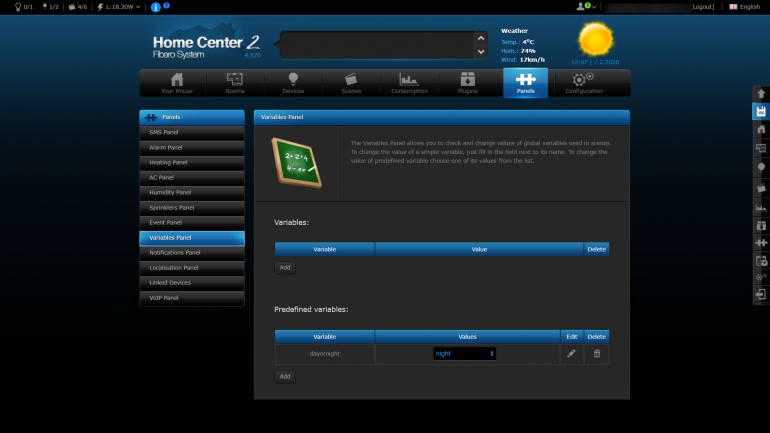
Panels are an important part of Scenes. With Panels you can determine your own rules for devices that can be used by means of graphic blocks. For example, you can ensure that devices take into account or influence, for example, the alarm, heating, air conditioning, specific events, different variables, location, connected devices and much more. Via the SMS panel you can even control your home when you do not have access to the internet; the possibilities are very wide.
Via Panels you can install the day and night cycle under the heading variables. You can read how to do this on the Fibaro site. Once you know how it works, the action speaks for itself. Because it is not difficult – you just have to know. So make sure you have the Fibaro site with manuals under your favorites or bookmarks for now. When this is over, you can go back to Scenes and then select the graphic blocks. Basically this works almost the same as the Magic scenes, although it looks slightly different.
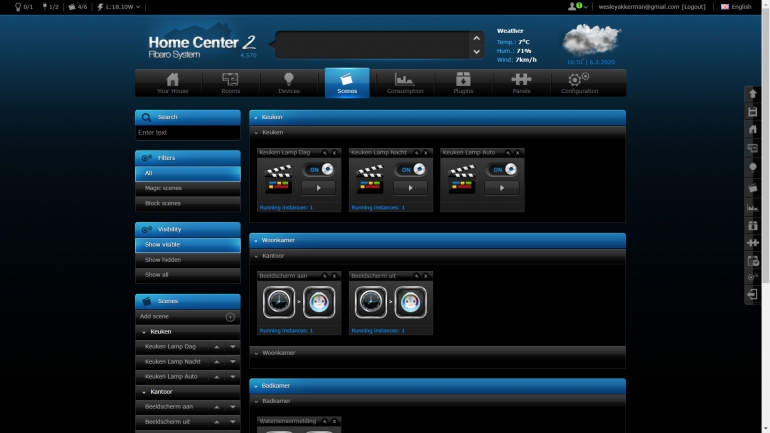
The way in which you set the scene is also slightly different. This involves that part of thinking differently. You have to create a scene for each action. Should the lamp be on? That’s scene one. Should it go out? Then there is scene two. Is there another variable, such as taking day and night into account? Then that’s your third scene. You can put a lot in one scene, but not everything. Also keep it simple for yourself, so that you can quickly find certain scenes afterwards and make adjustments where necessary.
Once everything is set up correctly, the system usually works fine. If this is not the case, you can adjust the properties of a device so that existing functions function differently. Initially, this way of working does not feel very accessible. But the more you work with it, the more you read about it and the more often things go well, the more you like the system and the more powerful it becomes. Afterwards you can check everything in your scenes and even copy some if you want to use them elsewhere within your network.
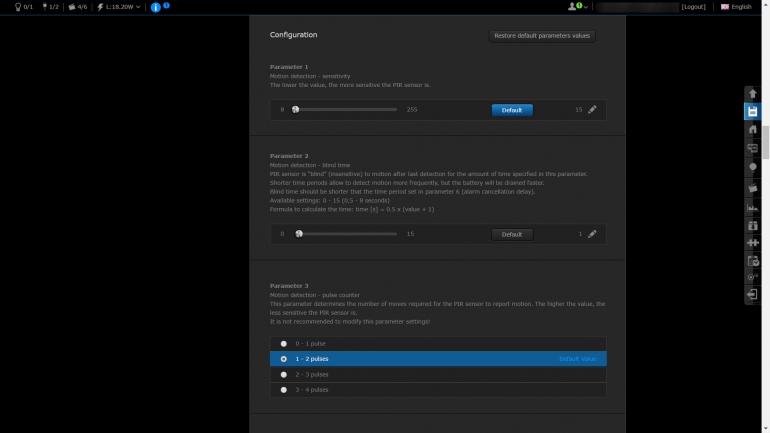
We have to say that you enjoy working with your home and appliances like that. Because, especially in the beginning, you spend a lot of time on it. You have to set up and configure the system. Not everything is immediately clear, but nothing is really insurmountable. We do not find that a disadvantage with Fibaro, that is the nature of the animal. The complicated structure provides an enormous number of possibilities, much more than you encounter in the above-mentioned systems, for example. And that is really cool.
We can go even further
We haven’t even talked about the third option yet: LUA Scenes. This is the most advanced way of setting up scenes. The scenes are based on the LUA programming language. When you start doing this, the possibilities are really endless, but the system will ask you to know how to program – even if only basically. The created scenes can be set very finely and go further than the fairly simple ‘if this, than that’ scenes that we discussed above.
This option is for people who really want to get the most out of their smart home or who want to manage a large house with an awful lot of smart products. If you are an average user, the method with graphic blocks will probably suffice, as they can already take into account many variables that you set yourself. If you are still short of options, but you do not understand programming? Then maybe you can view the Fibaro Marketplace and download scenes there. Then try to read in properly.
Fibaro: Consumption and Plugins
Finally, the web portal of the Fibaro Home Center 2 has two more parts that we have not yet discussed. For example, there is the button for Consumption. This allows you to monitor how much energy the products use in smart sockets, such as the Fibaro Wall Plug or Walli . At the bottom of the page is also the average temperature in the house, which is determined on the basis of various sensors. For example, there is a temperature sensor in the window and door sensor or the Motion Sensor.
Plugins is a part with which you can add services and devices from outside to your Fibaro system. A total of 181 plug-ins are available, including devices from D-Link, Sonos and Philips Hue. So you are not completely dependent on Fibaro when it comes to your smart home and you can therefore also purchase or continue to use other devices. The offering feels a bit limited, but that’s something that can be expanded in the future. Nevertheless, it is nice that those plugins are there.
Because, for example, you can have the lamps from Philips Hue, which you may already have hanging or standing, work together with sensors from Fibaro. You can also operate the lamps yourself via the system. Adding a plugin is quick and accessible. On the Plugins page you look up the manufacturer or service you want to add and a few clicks with the mouse later the systems are linked. As mentioned, the range is not yet large and you cannot add doorbells from Nest or Ring ( if you still want to ).
The Home Center interface 2
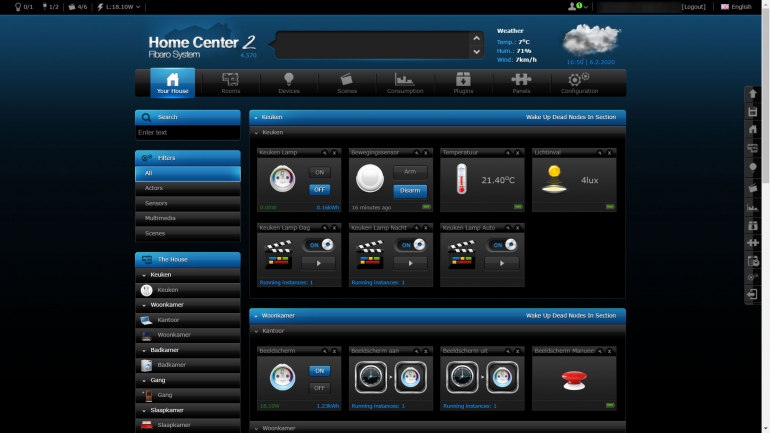
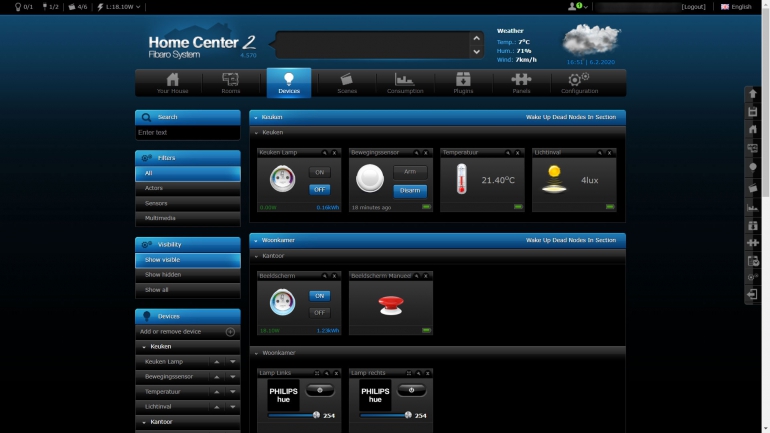
The interface is quite a bit to take in all at once. However, it is not unclear, but you will initially have to find where everything is. At the top you will find the most important aspects of your Fibaro system, where you can manage and set up all the above elements. You will find the options available for each part on the left. Under Rooms you will find the rooms, under Devices you will find the devices, et cetera. When you press on Your House on the far left, you will see an overview of everything that is there.
The layout of this home screen is intuitively designed and that is quite clever. Because it is quite a system that you work with. From the home screen you can arrange almost everything you are looking for, although it is better presented per part. You can immediately make adjustments to scenes or switch devices on and off from this screen. However, if you want to add a device or scene, you will have to press the buttons above. It all feels a bit much at first, but soon you will find your way. No worries.
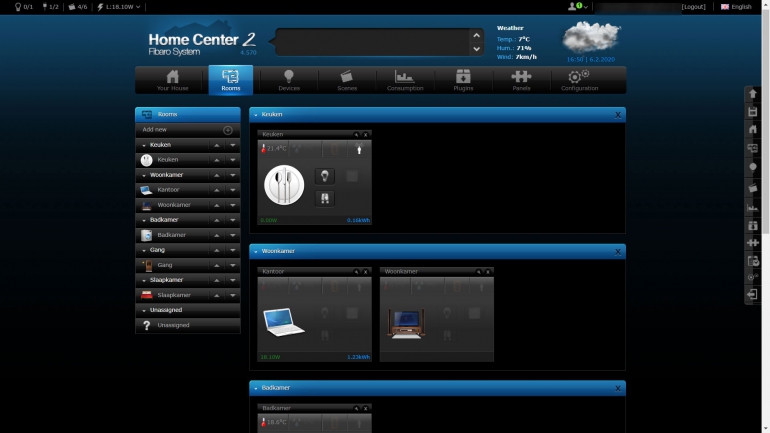
Sometimes there are still some cumbersome elements. Because you cannot literally arrange everything within the web portal. For example, you must first download another program with which you can find the Home Center 2 on your network. In addition, you must prepare the device for the cloud via the Fibaro website, otherwise you cannot operate the system remotely. That is something that you quickly overcome during installation, but you automatically run into it in daily use. A little more control in this is perhaps a bit more convenient.
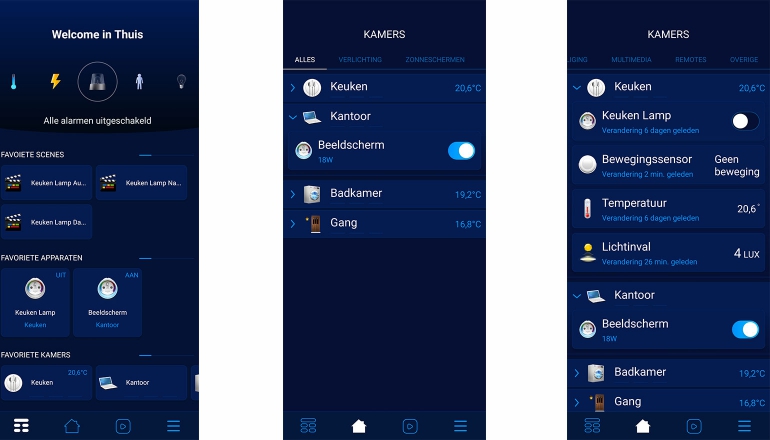
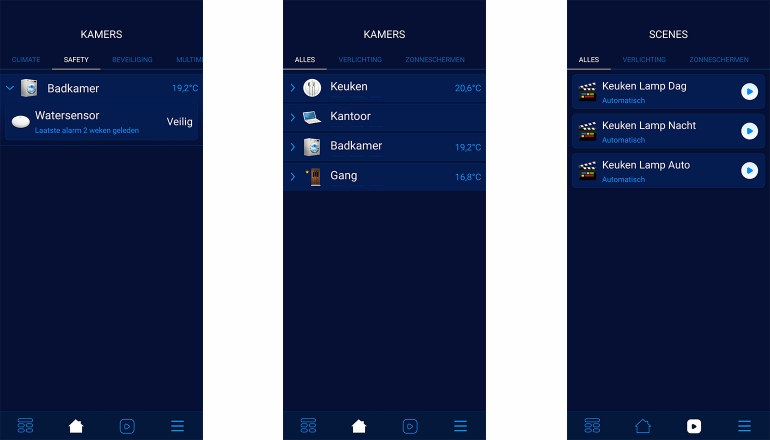
Then there is the application you can download for Android and iOS. This is more of a control panel than something you can do things with. If you want to add a device or scene, you have to do so via the web interface. You can switch devices and scenes on and off and you can keep track of the consumption. You can also see the temperatures and whether movement has been registered somewhere. The app is as useful as the devices you add, but that’s it. Plus, everything, or at least a lot, should work without an app.
Integration with other services
As soon as you have ensured that the system can also be operated via the cloud – so that you can, for example, switch on or off certain devices via the mobile app – you can also link the system to other services. It is good to know that there is an integration with IFTTT , the Google Assistant and Amazon Alexa . This will unlock a sea of possibilities. For example, it is possible to operate your Fibaro system by voice commands or even other devices.
The integration with voice assistants is important to make the system accessible. Although not everyone is used to the digital voice of the Assistant or Alexa, it is true that the group of users is growing. To come back to that stupid kitchen lamp: if you give the socket the name Keuken Lamp, as we did, and indicate in the system that the Wall Plug has a lamp, then the Google Assistant will know, for example, that there is a lamp. is operated when you say a command.
You can then shout: “Hey Google, turn on the lamp in the kitchen”. Then the Google Assistant knows that the Wall Plug in the kitchen must be activated. This is separate from the Motion Sensor, which in turn continues to do its job (especially when the lamp is switched off again and someone walks past during the set period). In addition, you can, for example, call out the command “Hey Google, turn off all lights” and then Google will turn off all set lights – regardless of the brand, as long as they are smart.
Fibaro – conclusion
Fibaro is one of the most comprehensive smart home systems currently available and we have tested to date. You can see from the review that there is a lot to discuss and that you can do a lot with it. One such article does not actually do Fibaro justice, but we assume that you now have a good idea of the system, the possibilities and the integrations. Initially a lot comes your way, but when you have enough interest you know how to struggle through all the options, the interface and the devices.
It is also a very cool system to experiment with. You may start with the Magic scenes the first few times, but you will soon notice the shortcomings. Creating scenes based on the LAU programming language will be too much for many users and that is why we are so happy with the graphic blocks. They offer a relatively accessible alternative that incorporates a great many possibilities. As long as you know what you want to achieve, you should be able to do it with Fibaro.
In addition, we are happy with the integrations of, for example, the Google Assistant and IFTTT and it is very cool that we can also implement products that do not come from Fibaro in the smart system. This way you have even more options at your disposal and you are not dependent on one manufacturer. Plus: if you already have some smart things at home, you don’t have to dispose of them or buy them again under the Fibaro name. It may not be for everyone, but otherwise it works perfectly.
Pros
- Incredibly extensive smart home system
- Lots of options and integrations
- Relatively accessible
Negatives
- Beginnings can be overwhelming
- Price of the Home Center 2
